Getting The Transfer Slides Into Digital Format To Work
With water damage, your impulse may be to dry liveinternet.ru/users/tricus8tmr/post463727295// the afflicted slides out completely. However cleaning them to remove any mud or particles is still a vital primary step. Hold the water-damaged slides along their edges and gently wash the dirt off both sides. If your slides have stuck together since of wetness, separate them carefully from one another.
Now, dry your slides. To do this, put them face up on a tidy piece of absorbent paper. Avoid utilizing printed paper as the ink might leech onto your water-damaged slides. Replace the paper every hour or two, till the slides are entirely attempt. You can also establish a fan to blow gently on the slides in order accelerate the drying process.
If your slides are already sorted by roll and stored in boxes, you're a step ahead. Next, put the slides into archival plastic pages. These are pages that suit 3-ring binders, or those you can store in hanging filing systems. Usually a sheet can hold upto twenty slides. So, most of the times, you may require 2 sheets per roll of movie.
About Slides To Digital
If the word "archival" puzzles you, it just suggests that the plastic pages won't harm your slides. Basically, if something is archival, it is devoid of corrosive chemicals that can consume away at items saved in https://www.washingtonpost.com/newssearch/?query=slides to digital it. The next part is affixing labels to these sheets. Here, you can use location, time, individuals or whatever labeling system makes good sense given the images in each sheet.
The Avery 6167 return-address labels are most commonly utilized for this function as they fit well in the slide mount area around each image. Microsoft offers Avery templates with Word and Avery offers free software application that can be used for printing their labels. Once you've printed out the labels, you can attach them to every slide and after that continue to fill in information for each of them.
Robert 01 - to position on the top line, followed by other pertinent details such as date, location, occasion, and more. It's incredibly important to digitize your slides or else you risk losing the valuable memories they include. The good part about Here are some methods to scan your slides at house: Using a Devoted film scanners are fitted with holders for negatives and slides to make the scanning process a lot easier.
All About Transferring Slides To Digital
You need to pay a bit for the benefit, nevertheless, as slide scanners are not low-cost. If you own a decent SLR camera, you can use a slide duplicator (or a duper). It attaches to your video camera in place of the lens, using a T-mount adapter ring. The other end is a sliding gate that holds two slides.
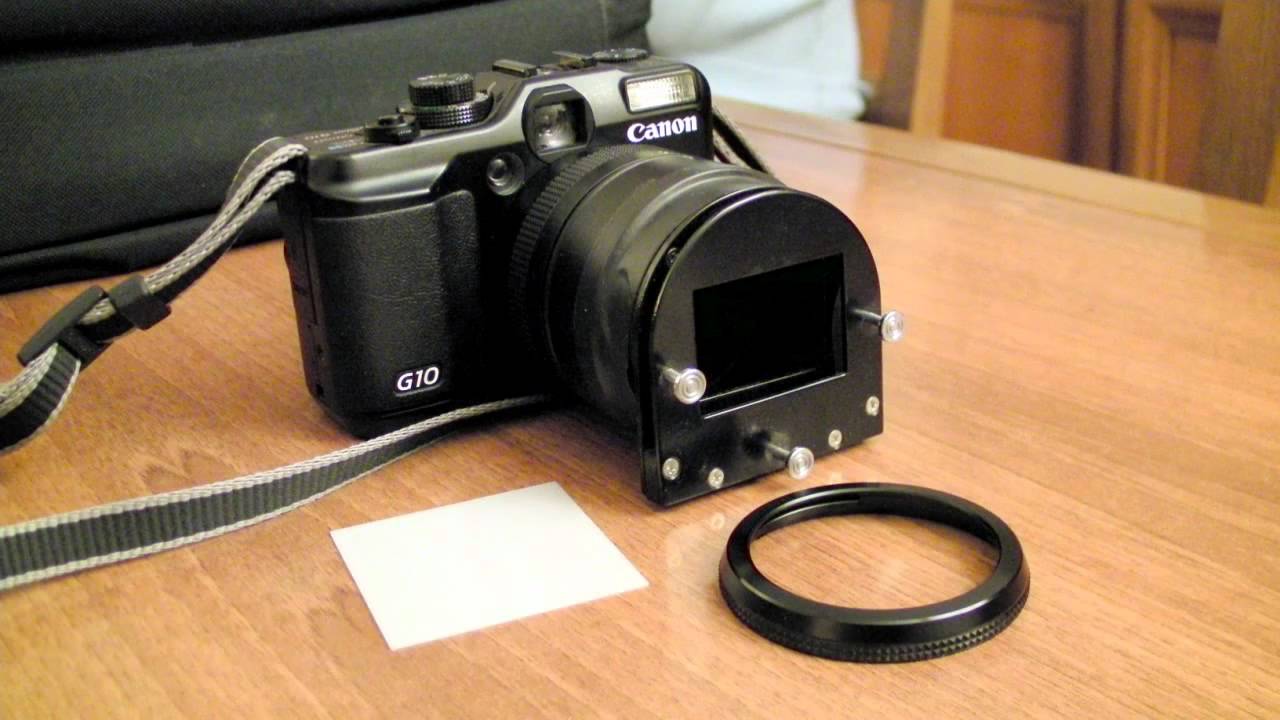
You can then take a photo of the slide. While slide duplicators are fairly inexpensive and easy to utilize, they do not use the quality you receive from an advanced scanner. Most digital cams likewise do not use the vibrant series of a scanner, which impacts the detail that can be recorded in the scanned image.
While not precisely accurate, it does enable you to begin to comprehend two important things about your scanned image: 1) how sharp it will look when printed, and 2) how big it can be printed prior to it starts to look a bit fuzzy. It is not true, however, that a higher resolution is constantly the very best solution-- often a more finely detailed scan can get the grain of the underlying product and give results that are inferior to a scan at a lower dpi. Slides that have been boxed up http://www.thefreedictionary.com/slides to digital for a very long time often develop scratches. One automated service for this issue is Digital ICE, a scratch minimization technology that is incorporated into many higher end scanners. The essence of this innovation depends upon utilizing infra-red light to spot and deduct out positions of dust and scratches from the final image.
Slides To Digital for Beginners
Often the scanned image may require more than just small fixes. This might take place, for instance, when mold on a slide obscures part of an image. A skilled remediation expert can action in here to reconstruct the image and make it whole once again. In cases where standard picture correction procedures such as those described above don't completely do the task, advanced image remediation can offer you the picture best outcomes you look for.
A slide scanner is a robust tool to have on hand for the project however these do not run cheap. And then there is the not-insignificant time factor. You have to spending plan one to 2 minutes per slide to scan and conserve it to a safe and secure location. Touch-ups and other image correction will contribute to this time.
However if you have hundreds of slides for which you have to duplicate this process, it includes a considerable time commitment. In cases where the image is substantially damaged, repair work can be both tough and time consuming. If you want to invest a bit in the project, it's most likely best to utilize an expert service, specifically when you have a bigger collection of slides to scan.
Transferring Slides To Digital Fundamentals Explained
Not just will you conserve time but you will get optimally scanned images that can then be printed and bigger. Lastly, a recognized professional service can also skillfully bring back photos impacted by dust, scratches, mold or more. .